Saturday, September 8, 2012

Homemade Chex Mix for Retro Recipe Saturday


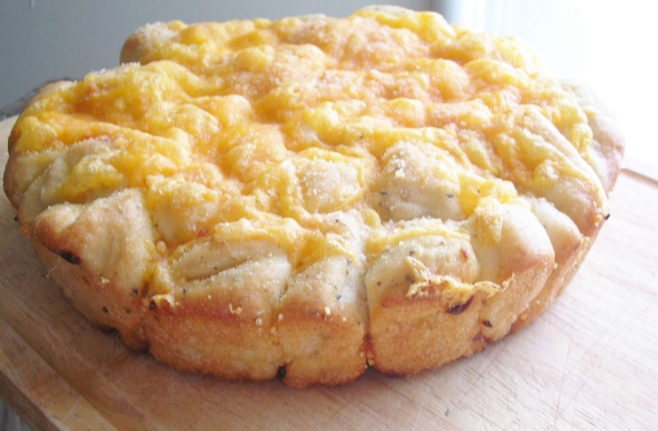
I love Homemade Chex Mix, not the kind you get in a bag from the grocery store, but the kind that you bake in the oven at home.  We made a batch of Homemade Chex Mix a few weeks ago.  Middle child Danny is still trying catch up on his favorite snacks food from being in the marines.  I took pictures, because I wanted to share this recipe with all of you.  I don't really follow the recipe on the box, I changed it long ago.

I decided that I wanted to give you some history on this great snack food.  So I did some research for all of you.  My Aunt Laura has been making this for as long as I can remember,  I knew it was an old recipe.  I found that the first recipe for Chex Mix was published in June 1952 issue of Life Magazine.  It is similar to what we have today, but in 1952 they only had Rice Chex and Wheat Chex.  There were several incarnation of Chex Mix until they came out with the recipe for "Party Mix" in the December 1963 issue of Better Homes and Gardens.

Here is the recipe that we use to make Homemade Chex Mix.


Ingredients:

2 boxes Wheat Chex
1 Box Rice Chex
1 Box Corn Chex
3 cup Cherios  (optional )
1 cups pretzels (optional , we don't use them )
1 cup nuts ( optional , we don't use them )
2 cups  butter or Parkay margarine
3/4 cup Worchestershire sauce
4 tsp seasoned salt

Directions:

Preheat oven 250 degrees.

In a sauce pan melt butter, and stir in Worcestershire sauce and seasoned salt.


Mix cereals and any other ingredients that you might want in the mix in a large roasting pan.


Then pour the 1/3 of the butter mixture over the cereal and mix the cereal to coat with butter.  Add the next 1/3 of butter and mix cereal mixture again, do the same with the last 1/3 of the butter.

Put in the oven and bake for 1 hour, stirring every 15 minutes.


Put on paper towels to cool.


Once cooled, put in tins or plastic containers to store.

Eat and have fun.


I hope that you like this Homemade Chex Mix Recipe.  I use more butter and Worcestershire sauce then the regular recipe on the box, because I like it really coated with the butter mixture, rather then dry.  Let me know what you think of this recipe.  It would be great with yesterday's Cosmopolitan's.

Enjoy!!!
Debi
Find us at these great parties

Friday, September 7, 2012

Cosmopolitans for Friday's Happy Hour and Favorite Blog Links of the Week


I am so excited to give you this recipe.  We made many different versions of Cosmopolitans last weekend to serve for my Mom's birthday.  Some were not so good.  Between my sister in law, my mom, and me we finally hit on the right recipe for the cosmos.  These are really tasty Cosmopolitans for Friday's Happy Hour.  After that we will have our great Favorite Blog Links for this week.

Now, enjoy these delicious Cosmopolitans for Friday's Happy Hour.

Cosmopolitan

Ingredients:

4 oz vodka
1 1/2 oz triple sec
5 oz cranberry juice
juice of 1/4 of a lime
1 1/2 oz grenadine

Directions

Mix ingredients well.  Add ice and make sure the drink is really cold before pouring into a martini glass.  Serve with a lime twist

Makes 2 cocktails

Are you ready for my Favorite Blog Links this week?  I am really excited to present these four great blogs.  It would be great if you would visit them and follow them if you like them.

Here we go.


I hope that you have enjoyed reading these great blogs, and I know you will love the Cosmopolitan's for Friday's Happy Hour.  Maybe have a Cosmo while you are reading these blogs.  Have a great weekend.

Enjoy!!!
Debi

Thursday, September 6, 2012

Caramel Apple Cheesecake


Last week I was reading different blogs and came across a recipe for Personal Apple Pie Cheesecakes with Caramel Sauce from Mommy's Sweet Confessions.  It sounded amazing and I knew I wanted to make a Caramel Apple Cheesecake for my Mom's birthday.  One of her favorite cheesecakes is an Apple Cheesecake from The Cheesecake factory.  I was off and running from there.

I decided to use my cheesecake recipe and adapt it.  I made a graham cracker crust, an apple pie filling, and I used a store bought Dulce de Leche.  I must tell you that I made it for my Mom's birthday last Sunday and it was truly amazing.  So I want to thank Lindsay for giving me the inspiration for this cheesecake.

Here it is, without further ado, Caramel Apple Cheesecake.

Ingredients:

Filling:
5 8 oz packages cream cheese softened
6 eggs
1 pt sour cream
2 cups sugar
2 TB cornstarch
1 tsp vanilla

Crust:
1 1/2 cup graham cracker crumbs
1/4 cup sugar
1/4 cup butter melted

Apple Pie Filling:
3 apples - peeled, cored, and cut into cubes
1/4 cup sugar
1/2 tsp cinnamon
1/8 tsp nutmeg
1 TB cornstarch
1/4 cup water

3 cans Dulce de Leche - you can find it in the section with sweetened condensed milk in the store

Directions:

Preheat oven to 350 degrees.  Spray a  10 inch spring form pan with nonstick cooking spray.


Mix the ingredients  for the pie crust and press firmly into the bottom and part way up the sides of the spring form pan.  About 1/2 inch up the side of the pan.  Bake for 20 minutes.  Set aside when done.


In a saucepan add the apples, sugar, water, cinnamon, and nutmeg, and bring to a boil.  Then simmer until apples are tender about 15 minutes.  Once apples are cooked add the cornstarch to thicken the apple pie filling.  Cook another 3 to 4 minutes.  When thickened set aside.


Next add your softened cream cheese to a mixing bowl and whip your cream cheese with you mixer.  Once the cream cheese is whipped add the eggs one egg at a time.  You will need to scrape down the sides of your bowl every once in a while to make sure that it is mixed well.  Next add the sour cream, and mix well.  Next add the sugar, cornstarch, and vanilla.  Mix well until the cream cheese mixture is smooth.  There should not be any lumps in your filling.


Next put your apple pie filling on the bottom of your pie crust.  It should be about 1/2 inch from the sides of the pan.  Then pour your cheesecake mixture over the apple pie filling.

You will next need to put 1 can of Dulce de Leche in a bowl and heat in the microwave until runny.  It took mine about a minute and a half.  You don't want it too runny, but you want it pourable.  Pour in a swirling pattern in the cheese cake.  Then take a knife and swirl the Dulce de Leche through your cheesecake.


Bake cheesecake for 1 hour and 20 minutes.  It should be pretty firm in the middle and lightly browned on top.  ( if it still shakes in the middle it is not done.  It will rise in the middle, but not as high as the edges.) It is okay if it cracks, that is normal.

Once done, turn the oven off and leave in the oven for 1 hour with the door open.  Next 1/2 release the pan and keep in oven for another 30 minutes with the door open.

Then take the cheesecake out of the oven and cover and put in the refrigerator to finish cooling.  After a couple of hours you will heat the other 2 cans of Dulce de Leche like you did with the first can.  This can be a little thicker then last time, because you are going to spread it over the top of the cheesecake.  You can then put it back in the refrigerator until you are ready to serve it, or serve it  now.


This serves 12 to 16 depending on the size of the pieces you cut.

This turned out great, everyone loved it, especially my Mom.  Let me know what you think of this recipe.  I hope that all of you like it too.

Enjoy!!!
Debi
Find us at these great parties

Wednesday, September 5, 2012

Simple Anti-Aging Moisturizer and Wednesdays Adorned From Above Link Party 16

Welcome to my Wednesdays Adorned from Above Link Party 16.   I hope that all of you have fun, and I can't wait to see all of your beautiful work from the last week.  You are all truly amazing.  I want to thank all of you for your support of Adorned From Above.  I really appreciate all of the time you take to link to my parties.  Keep up the good work.

The first thing I am going to ask any of you to do is to become a GFC Follower if you are not already following me.  I would really appreciate it. You could also follow me on Pinterest, Twitter, or Facebook, Linky, anything you want.

This week I am featuring the three top blogs that had the most visits. Clicking on the like button will also help to pick which posts you like the most.  Right now I am picking the links with the most page views.
 
I am thrilled to feature the following posts this week.  So without further ado, I would like to present these beautiful and informative blogs.  To those of you that I featured just grab my new Wednesdays Adorned From Above Featured Button in my sidebar, or you can post a text link.


I want to thank everyone who linked with my Wednesdays Adorned From Above Link Party.  All of your projects are wonderful and I would feature all of them if I could, but I think that the blog would probably be a little too long.  I hope that all of you link more posts this week.  Let's Party!!!

Your posts can include anything, I would love to see what you have been up to.


The only rules are to follow me, have a link somewhere on your post to Adorned From Above, and visit some other posts - after all it is a party.
I've received a lot of requests for a simpler version of my Anti-Aging Face Cream, so today we have new version called Simple Anti-Aging Moisturizer.  It is a lighter version of the cream without as many oils, but I have tried to keep the integrity of the original recipe.  I wanted it to still have the Anti Wrinkle properties of the DMAE and the benefits of the Green Algae.   So it still has DMAE and Green Algae, and I have kept the jojoba oil which will help the DMAE penetrate your skin.  I have also kept the evening primrose oil and the rose hip oil, because they are great for all skin types, but especially maturing skin.  I have also kept some honey in this recipe, because it it actually draws the moisture into your skin.


So here is a new easier version called Simple Anti-Aging Moisturizer.

Simple Anti-Aging Moisturizer

Ingredients:

2 oz evening primrose oil
2 oz rose hip oil
2 oz jojoba oil
1 oz beeswax
1 TB raw unfiltered honey
1 tsp lecithin
1 tsp borax
3 capsules Marine Greens Sea Algae formula ( opened up and poured out)
1/3 cup boiling distilled water

Directions:

Bring the water to a boil.  Pour 1/3 cup of water into a measuring cup.  Add the green algae and whisk together well.  Then add the borax, and whisk again, and next add the lecithin and whisk well again.


In a small pan melt 1 oz beeswax over low heat.  When almost melted add the honey and whisk together.   Turn off stove and slowly add each of the oils, whisking after each addition.  Next add the DMAE and whisk again.

Pour the oil mixture into a blender, turn the blender on high, and slowly add the water mixture into the blender in a small stream through the hole in the top of the blender.  Keep blender going until your cream becomes the consistency of mayonnaise.  You may need to scrape down the sides of your blender several times during this process.  The process of adding the water to the oil in the blender is called emulsification.  You are turning your liquids into a creamy consistency.  This takes approximately 5 minutes more or less depending on your blender.

I store my creams in white plastic containers that I get from Whole Foods.  This recipe makes 8 ounces of cream.  This should last a long time.  I keep a 3 ounce container in my bathroom and store the additional containers in my refrigerator.  It lasts forever.   I always share with my mom and my friends.  They are my guinea pigs for testing these recipes.

I hope that this meets your needs for a simpler recipe without losing the anti-aging properties of the original recipe.  Let me know what you think.  I always love hearing from you.

Enjoy!!!
Debi

Tuesday, September 4, 2012

Natural Ammonia Free Window Cleaner


In my quest for natural homemade products, I was looking to make Natural Ammonia Free Window Cleaner.  I started with just vinegar and water, but found it needed some additional oomph.  That mixture left my husbands car windows streaky, not good when you are driving.  So I started doing some research and found that I could add some lemon juice to window cleaner mixtures and that would possibly fix the problem.

I ended up taking several factors into consideration.

1.  I found that I distilled water works better because it has fewer minerals to leave a film.
2.  I did add the lemon juice to my window cleaner, which works great, and it smells good.
3.  I have known for a very long time that newspaper works better to clean the windows then paper towels.  I don't know why this is, but it does work.  (I had a window business a long time ago )
4.  Do not wash the windows in direct sunlight it will cause the cleaner to dry to quickly and streak.
5.  I read at http://www.tipnut.com/ to wash one side of your window wiping up and down, and wash the other side of the window side to side will help reduce streaking.  It really works.

So now that I have given lots of information, here is the recipe.

Natural Ammonia Free Window Cleaner


Ingredients:

1/2 cup vinegar
3 1/2 cups water
3 TB lemon juice

Directions:

Mix all ingredients together in a spray bottle, and clean away.

Makes 4 cups window cleaner

Let me know what you think of this recipe, and what you use in your window cleaner.  I love hearing from you.

Enjoy!!!
Debi

Monday, September 3, 2012

John 3:16


Happy Labor Day everyone.  I hope you're having a great weekend.  I am taking today off, so today I am just writing a short verse.  It's so beautiful and important for all of us to know.  John 3:16 is known by most Christians, but last year the Bronco's quarterback, Tim Tebow, brought it to the forefront of this nation.  There was even a commercial during the playoff's that actually read people the verse and showed it to them, also.  How amazing is that?  During a prime time playoff game, every person who was watching the game heard and read John 3:16.  Isn't God great.

For God so loved the world He gave His only begotten Son,
that whoever believes in Him should not perish
but have everlasting life.
John 3:16


I love hearing from you.  Have a great weekend. 
Debi

Sunday, September 2, 2012

Thrift Shop Finds in August Part 2

Today I'm going to show you some of the other things I got at the Act II Consignment Store in Littleton and Mercer Street Consignment Store in Denver.  I hope that you have fun seeing these great buys.  I really had fun getting them


Banana Republic Dress a with tags from Act II with tags for $118.00  I paid $31.00
NY and Company cardigan with Tags $38.00. I paid $7.00


Emilio Pucci Sandals barely worn Mercer Street Consignment Store $86.00


 Kate Spade Purse from Act II in Littleton $31.00


Maurizio Taiuti  bag from Act II in Littleton  $12.00

I bought these at 2 different times, and I really had fun.  The dress and sweater still had their tags on them, so they have never been worn.   The sandals were an amazing deal, and if they were worn more then once or twice I would be surprised.  I have not been able to find the original price on these Emilio Pucci Sandals, but I think they were probably somewhere between $300 and $500.  They are beautiful, and my best buy.   The two purses were also great deals.  They are smaller to use for evening, and I have been looking for smaller bags for a long time, so these absolutely fit the bill.

I would love to hear about your recent finds.  I always love hearing from you.

Enjoy!!!